First AR Invoice Walkthrough
Overview
Section titled “Overview”This walkthrough sends your first outbound sales invoice via PEPPOL using the simplest path: manual New Invoice in Out Docs. For volume options later, see Creating & Sending Sales Invoices.
Prerequisites
Section titled “Prerequisites”- Legal Entity created
- PEPPOL registration approved for that entity
- Access to Invoice Manager at
/flow - A customer PEPPOL Receiver ID you can use for a test send
Step 1: Open Out Docs
Section titled “Step 1: Open Out Docs”- Go to
https://your-site.tapr.ch/flow - Open Out Docs (sales)
- Click New Invoice
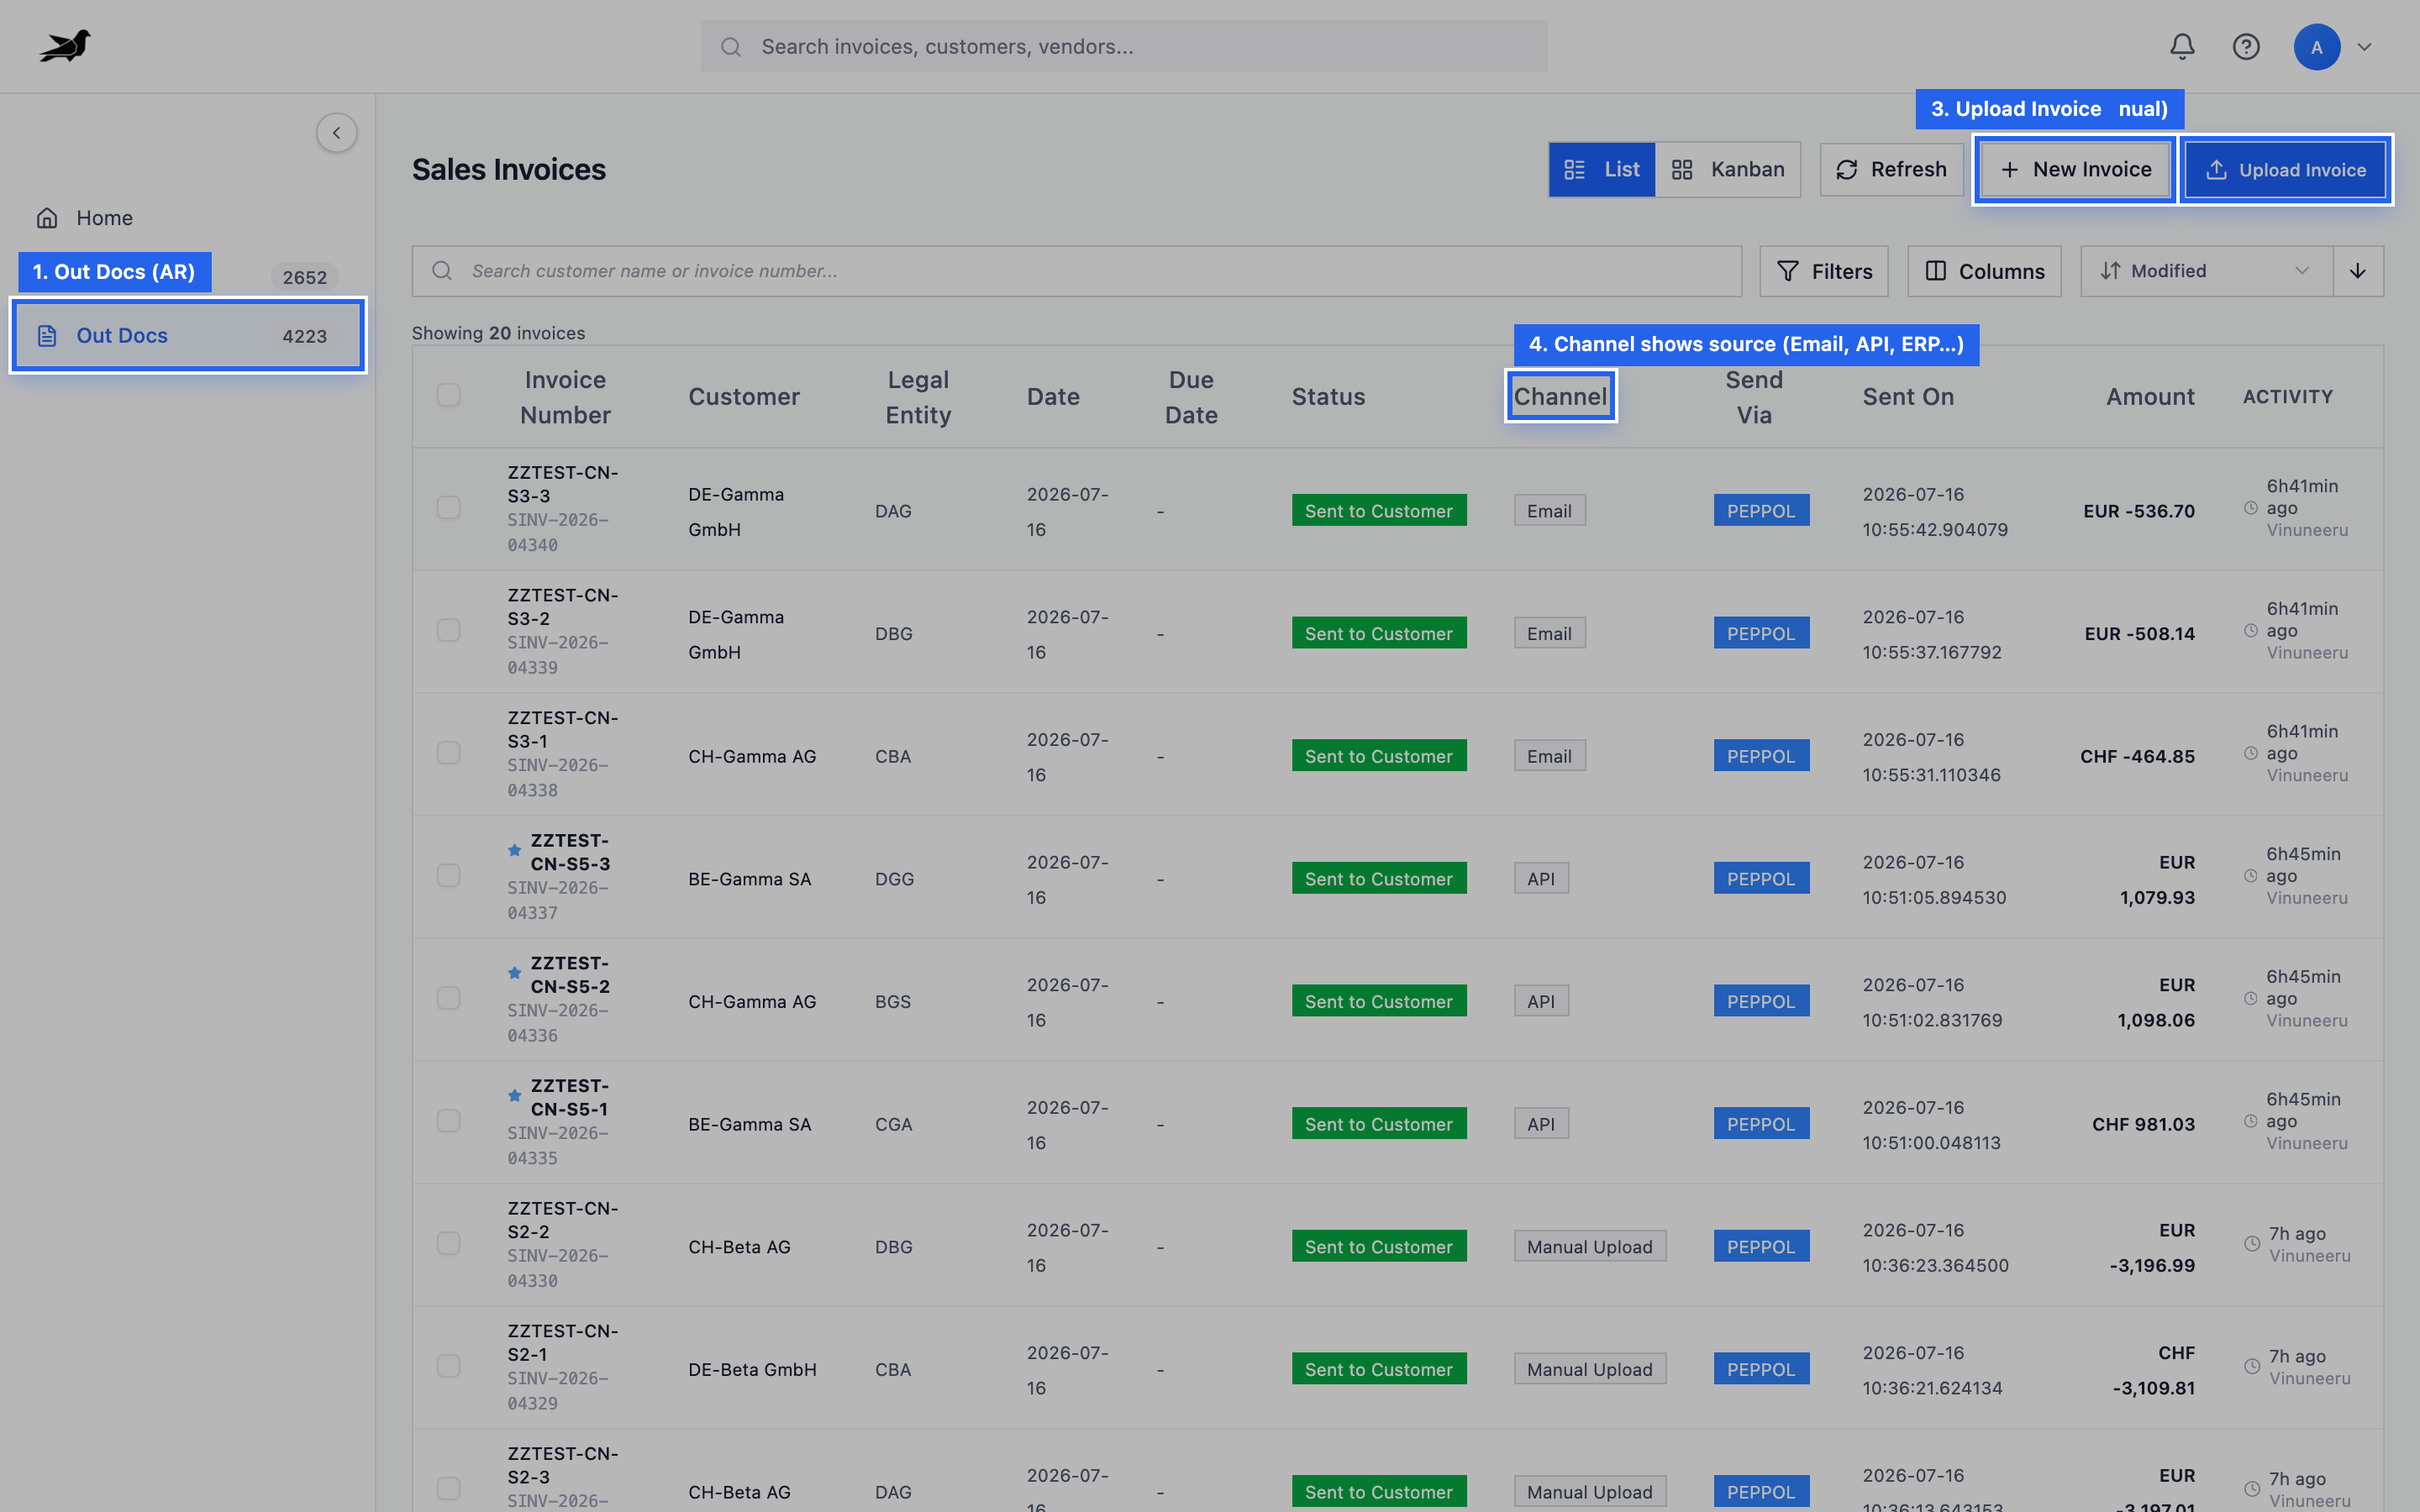
Sidebar Out Docs → New Invoice (or Upload Invoice for PDF/XML).
Step 2: Create a draft
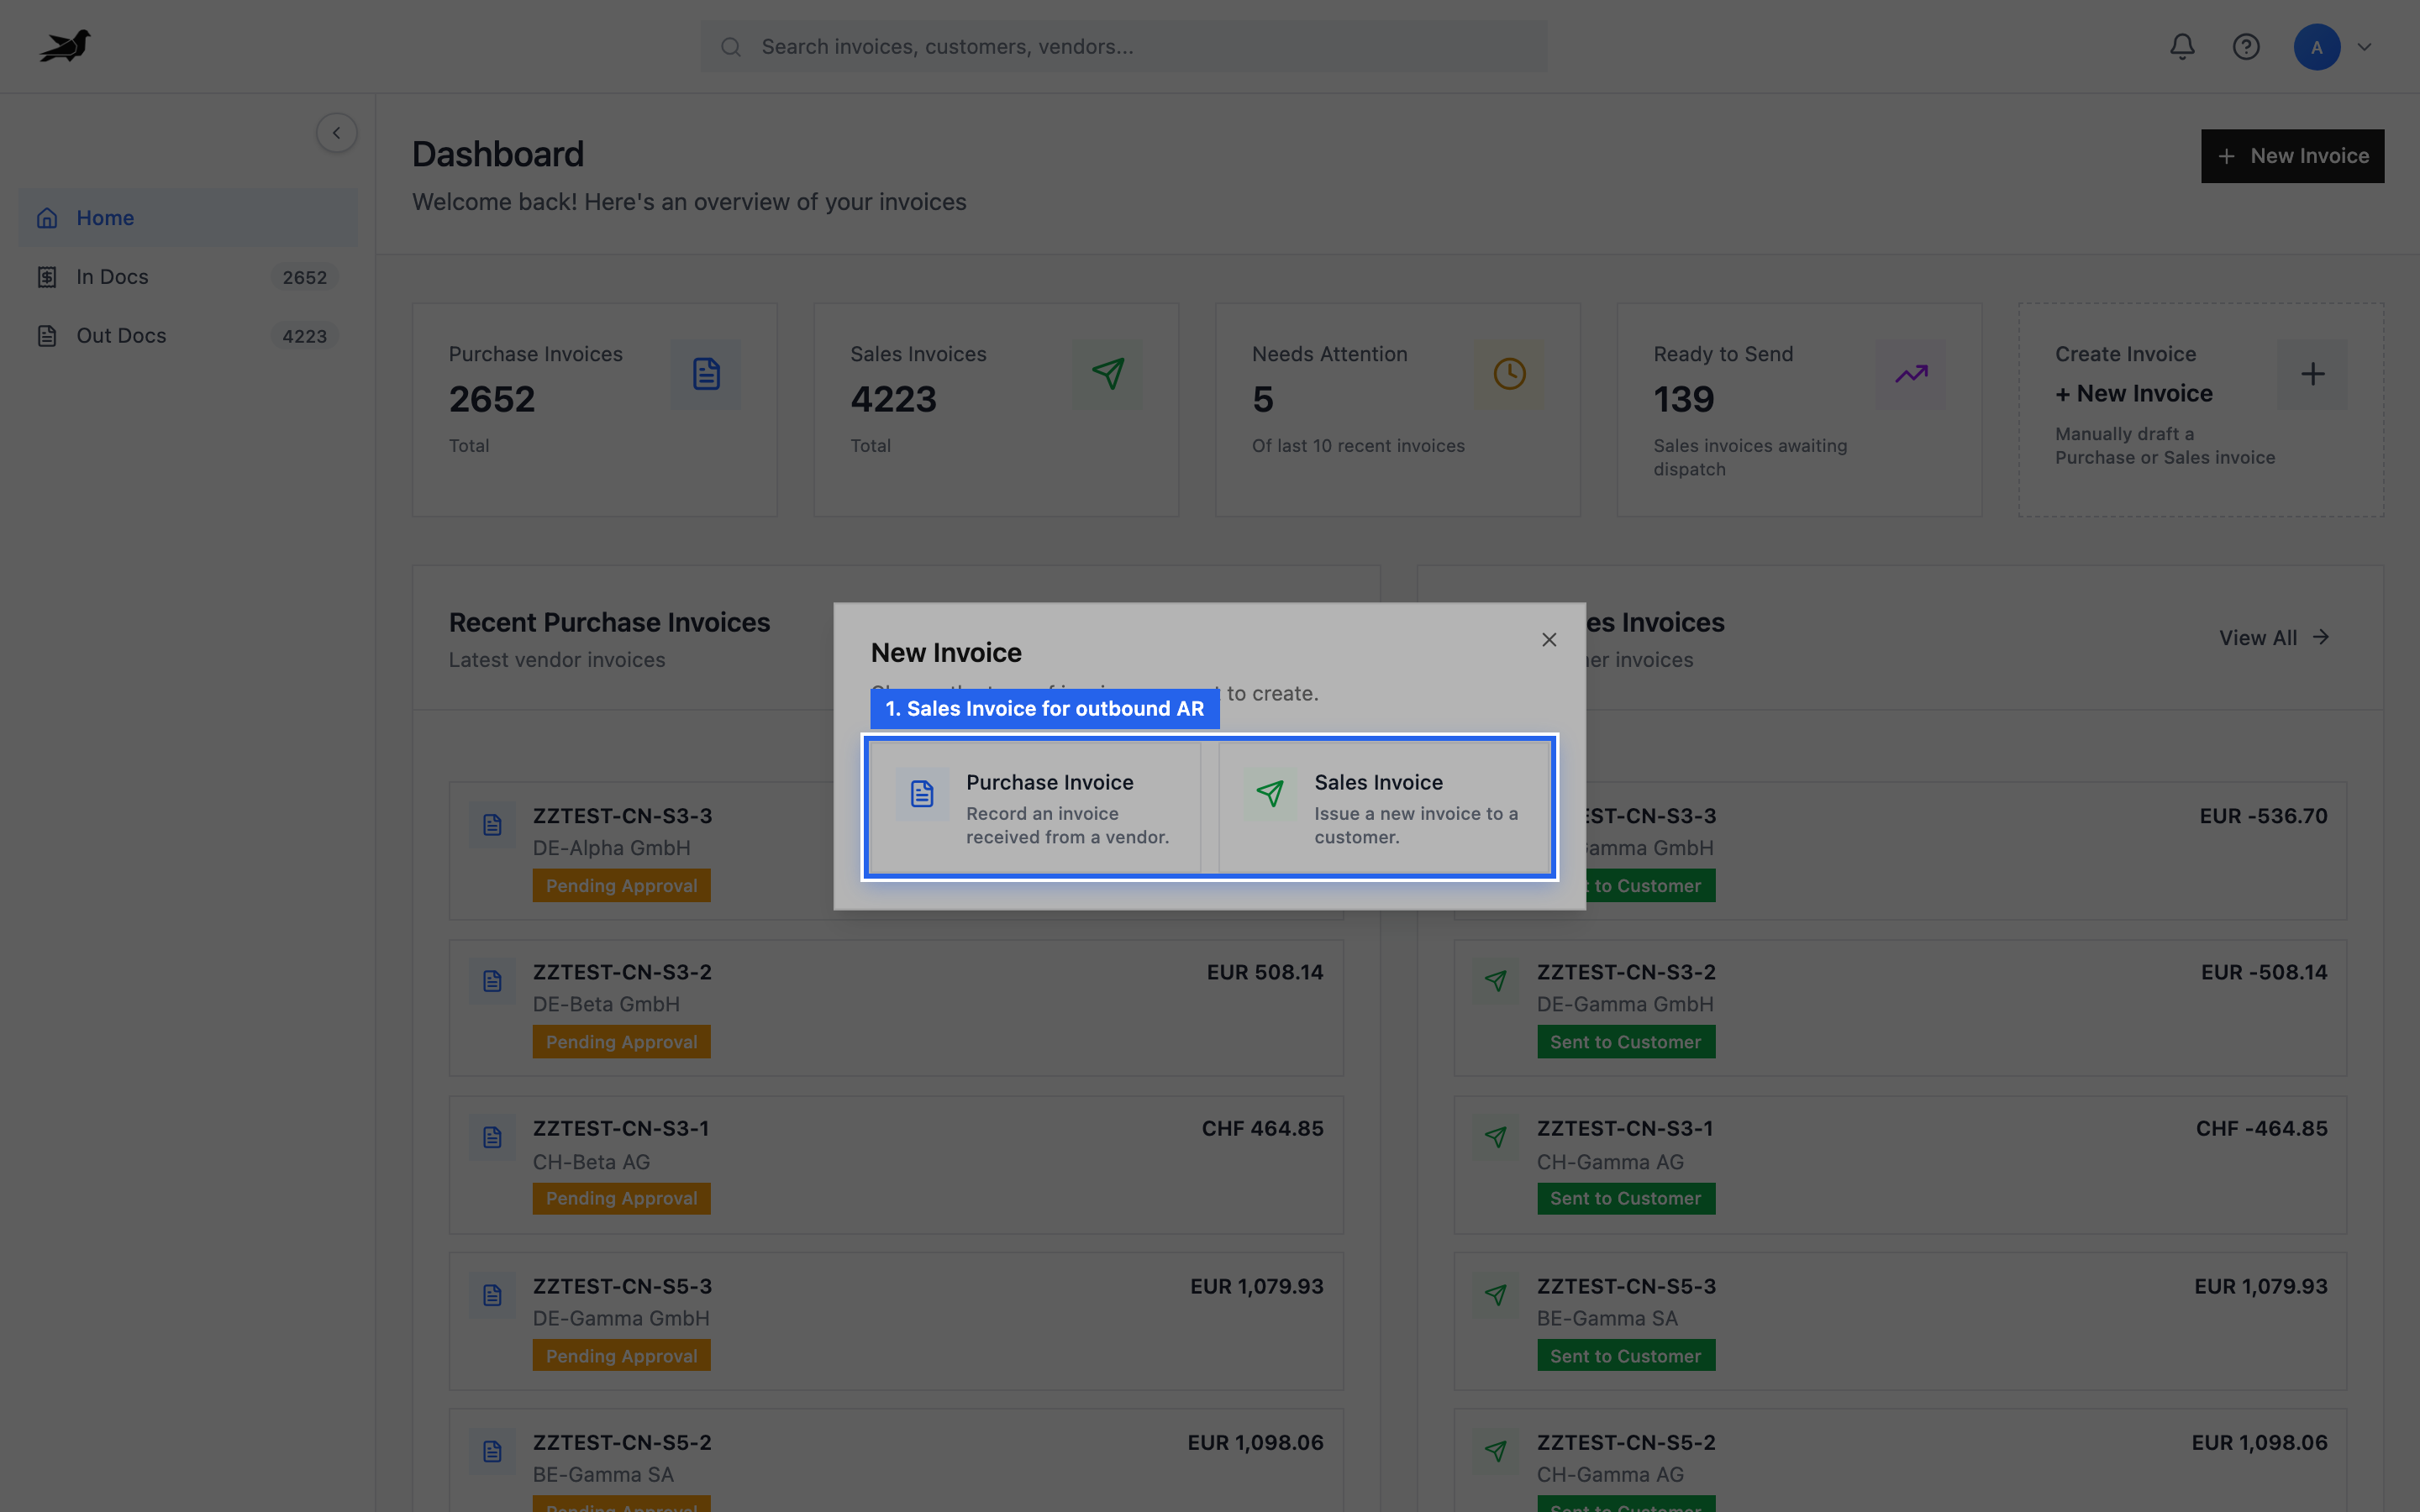
Section titled “Step 2: Create a draft”If you start from Home, choose Sales Invoice:
Fill:
- Legal Entity
- Peppol Receiver ID
- Invoice date, currency, invoice number
- One line: description, quantity, unit price
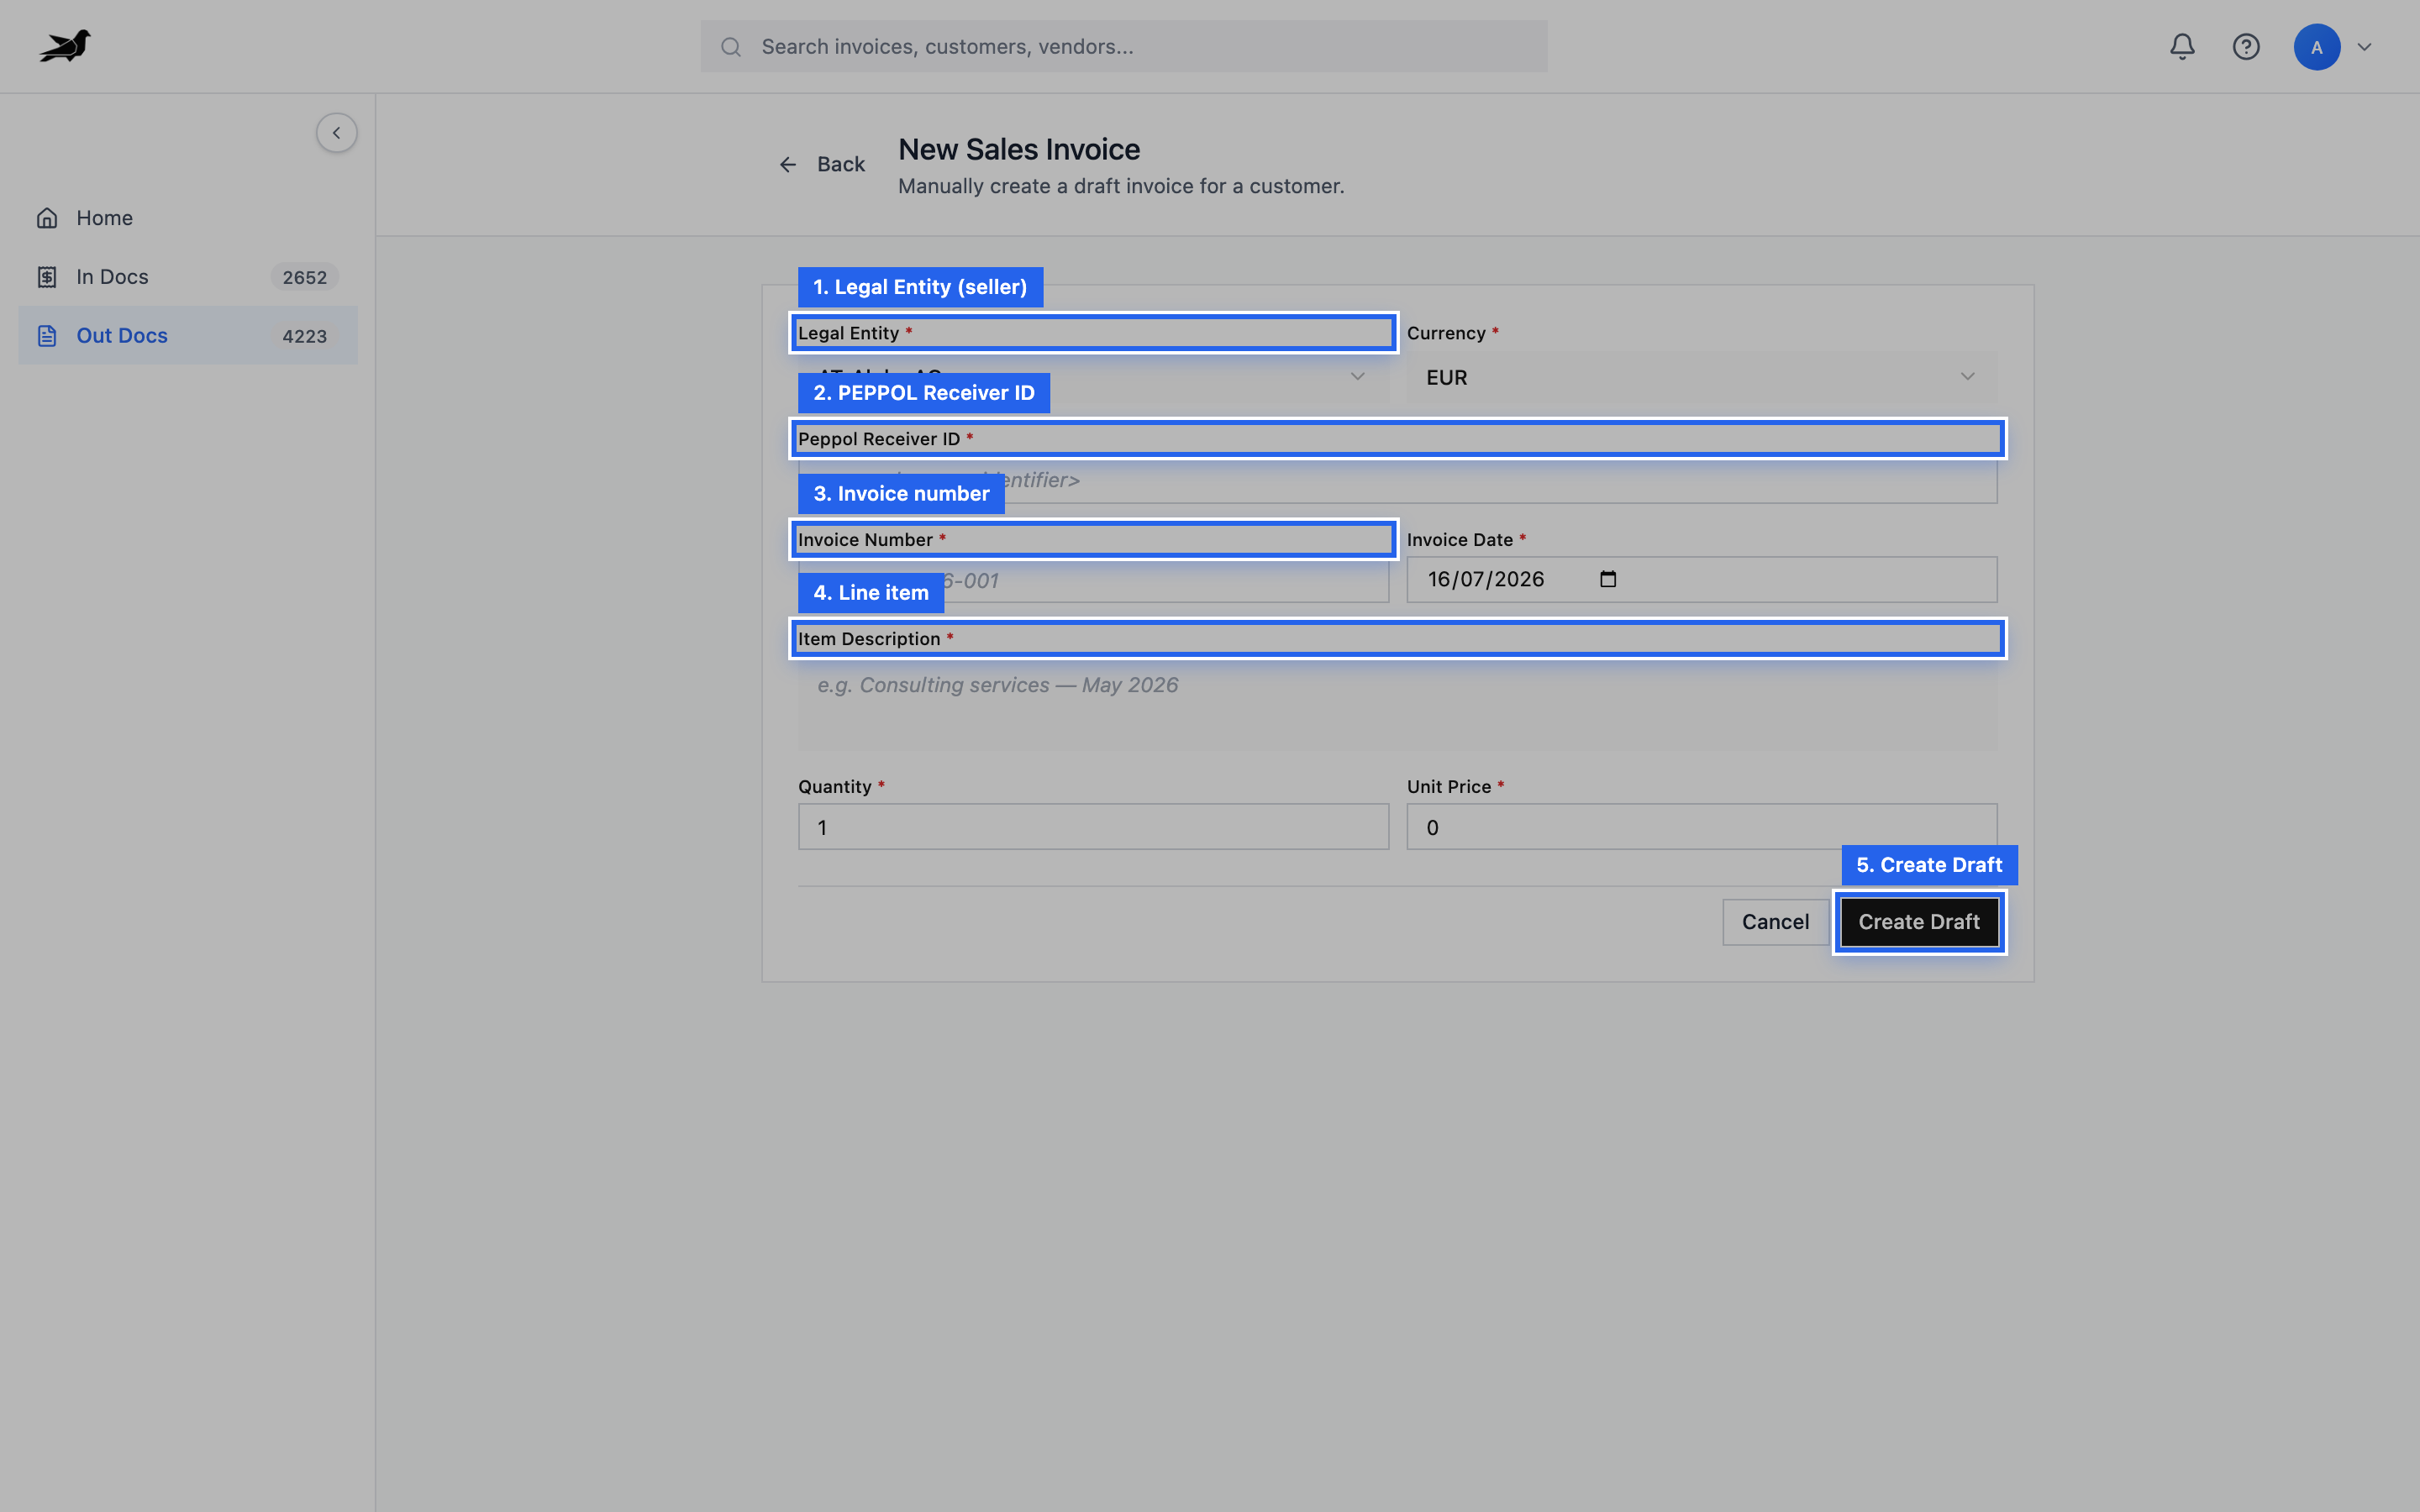
Submit (Create Draft). Tapr opens the draft sales invoice.
Step 3: Complete the invoice
Section titled “Step 3: Complete the invoice”Add any extra lines, taxes, payment terms, or customer address fields required by your PEPPOL profile. Confirm the receiver ID still looks correct (SMP lookup).
Step 4: Advance to Ready to Send
Section titled “Step 4: Advance to Ready to Send”Submit / approve according to your legal entity rules until the state is Ready to Send.
Step 5: Send
Section titled “Step 5: Send”- Choose Send to Customer
- Confirm success → state Sent to Customer
- Note any PEPPOL reference id
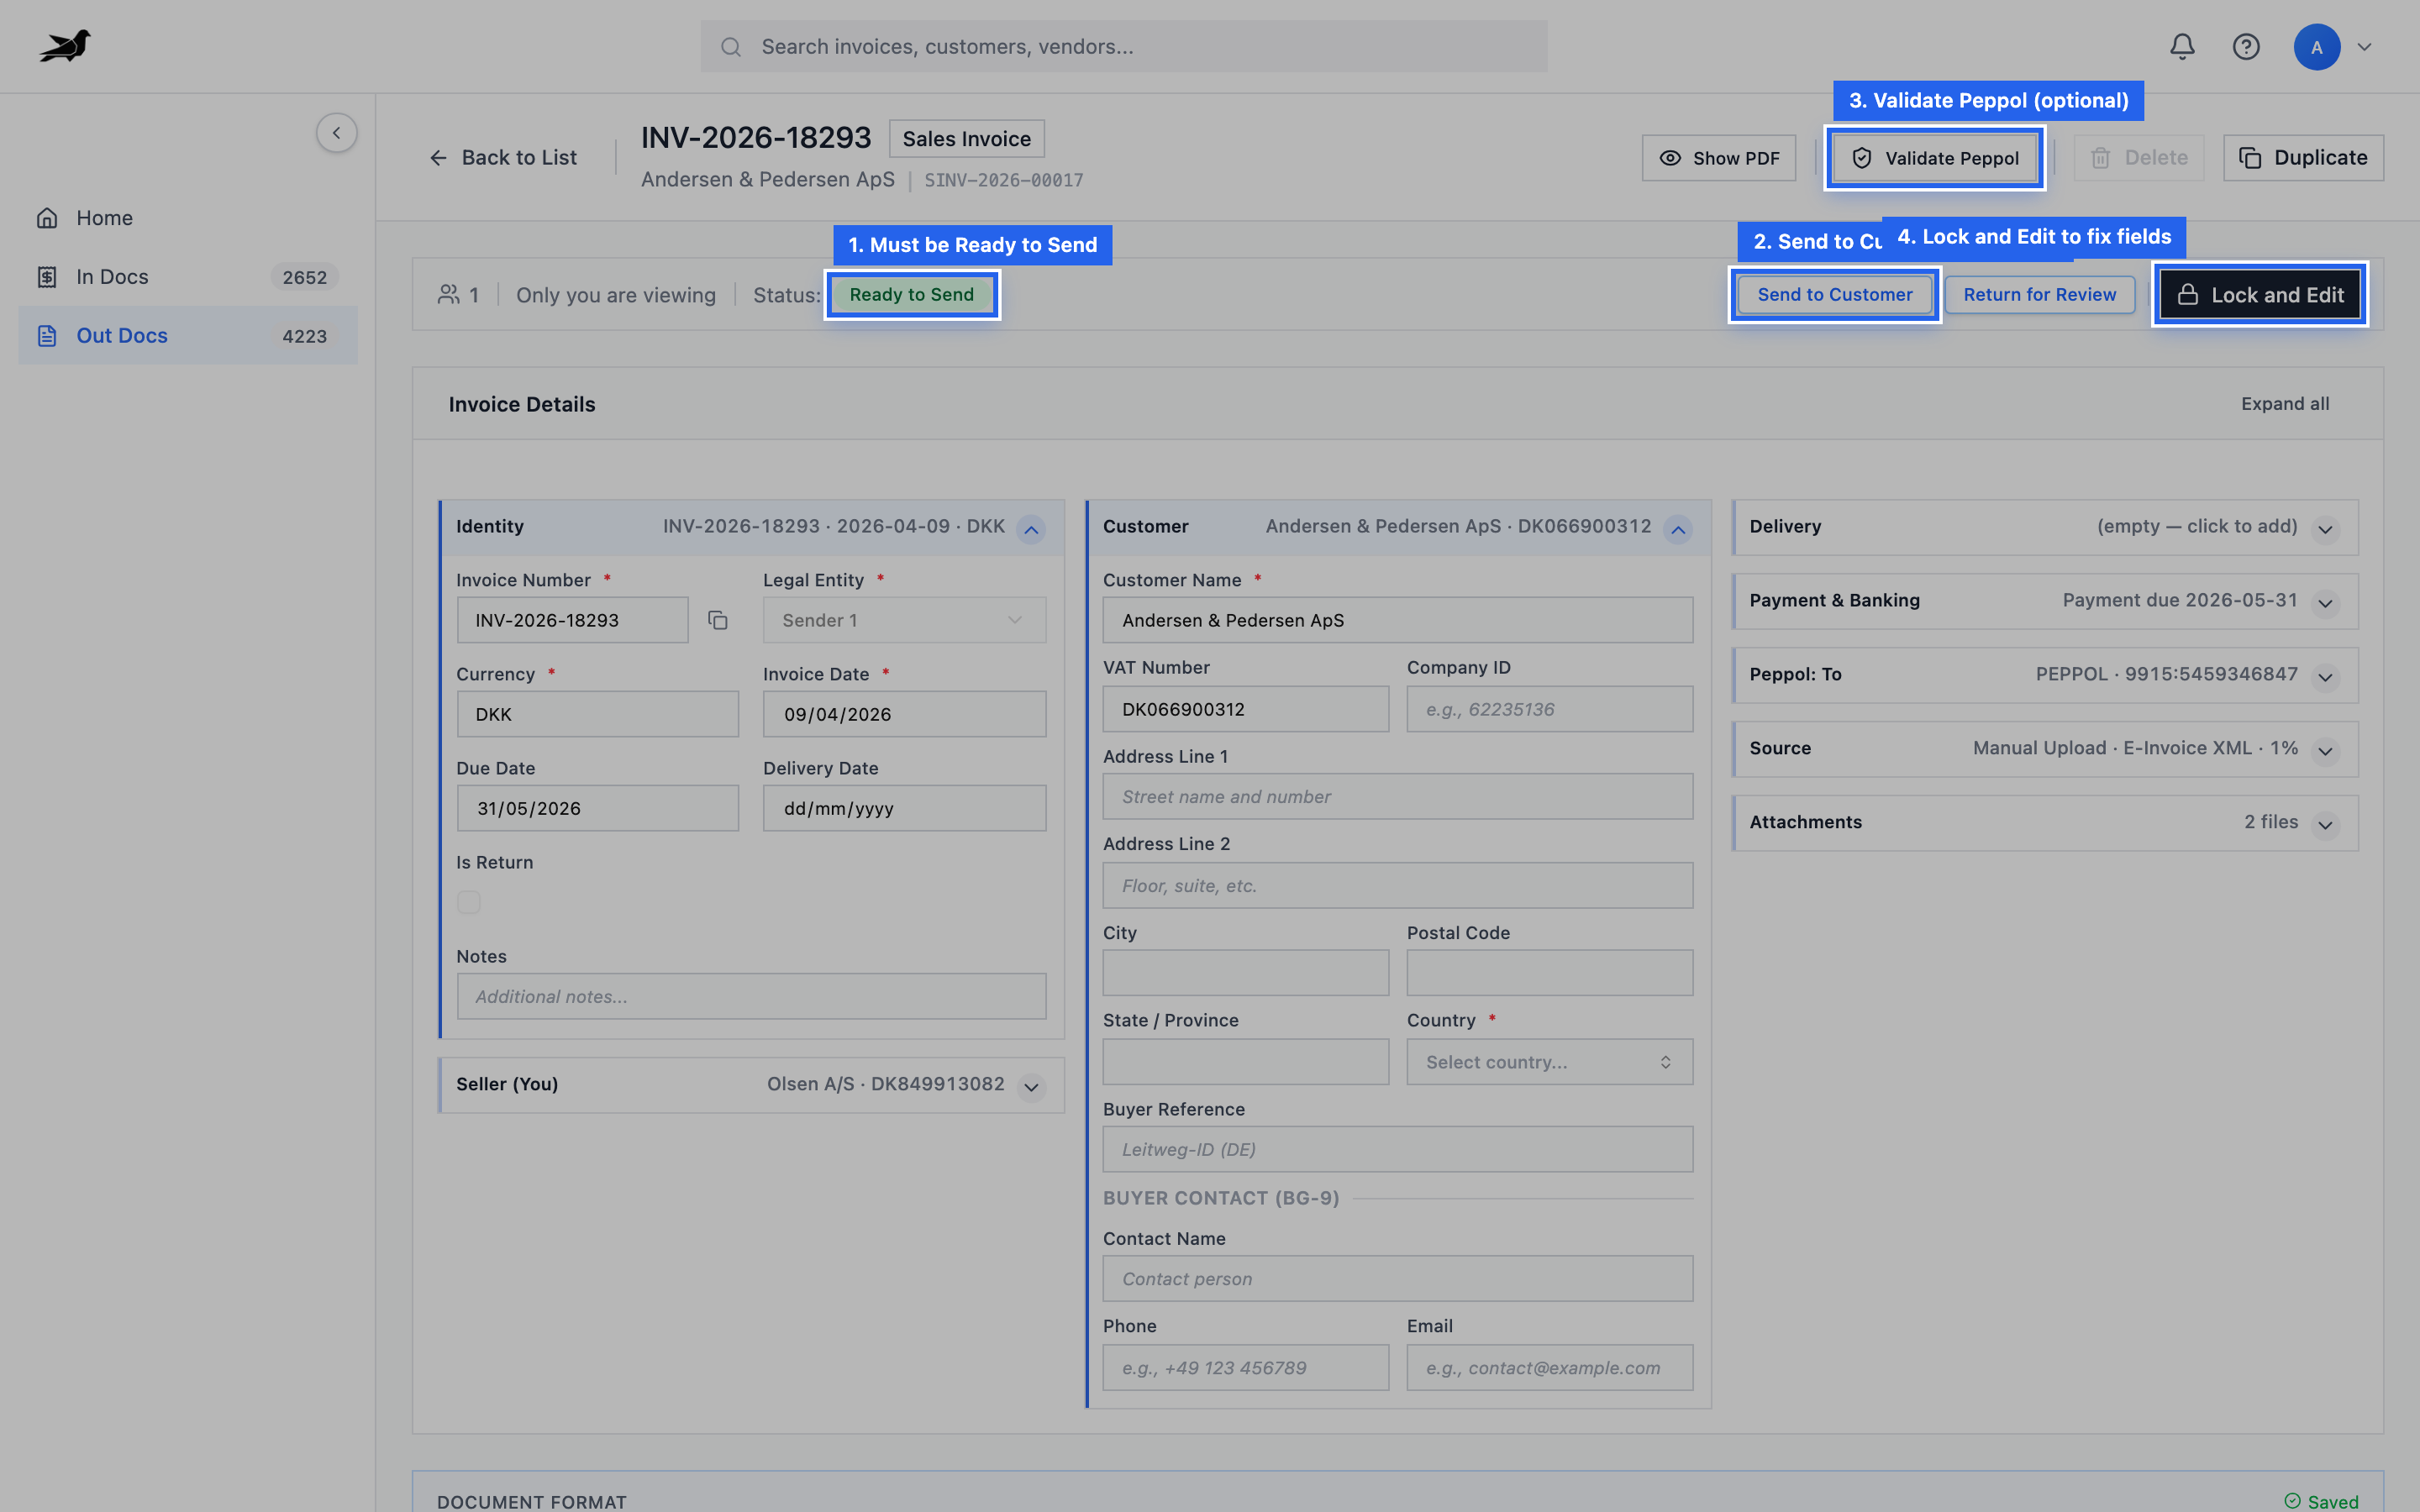
Status Ready to Send → Send to Customer. Use Validate Peppol if you want a dry-run check first.
Step 6: Check delivery
Section titled “Step 6: Check delivery”Watch MLR status on the invoice when the network responds. See MLR & Invoice Response.
Next steps
Section titled “Next steps”- Go-Live Checklist
- Reviewing & Sending Sales Invoices
- Enable Upload / AR Email (BYOK AI) or ERP fetch for higher volume